Showing posts with label Bash script. Show all posts

Sunday, November 27, 2016

Display switcher for terminal buffs

I am not a Linux developer or anything, I just love writing scripts that facilitate in making me lazy. So here's one that lets me switch my displays (dual). I usually work on only one and when I need to quickly switch, I use this. It depends on xrandr though. And it has my display names hardcoded (lots of assumptions, I know), but it might just come in handy.
Switch to left or right
./reset_display.sh left
./reset_display.sh right
Set both on with duplicate view
./reset_display.sh
Set both on their individual view
./reset_display.sh both

You can simlink it /usr/local/bin too.
Github gist

Saturday, February 07, 2015

Mount non Linux drives automatically when they are not in /etc/fstab

So, I usually face this problem when I'm not using GUI based File Managers. They allow you to auto mount drives when you click on them but when you are using CLI based file managers or no file managers at all, the only way is to mount them through writing commands. I'm a lazy fad and I want this done automatically. So here's a script for that. [ https://gist.github.com/Tafhim/5d0839caca813ae82c97 ].
#!/usr/bin/zsh
if [[ "$1" == "" ]] then
  echo "Please specify a device name";
  exit;
fi;
deviceFile=$1
 
## Auto mount only ntfs, fat32, vfat
for i in $(ls $deviceFile* | grep '[0-9]$'); do
  blkid -s UUID -o value $i | read z;
  blkid -s TYPE -o value $i | read f;
  echo "$z is $f";
  if [[ "$z" !=  "" && ("$f" == "ntfs" || "$f" == "vfat" || "$f" == "fat32" ) ]] then
    /usr/bin/udisksctl mount -t $f -b $i # https://help.ubuntu.com/community/AutomaticallyMountPartitions
  fi;
done

Saturday, November 02, 2013

Convert images and apply various effects on them using the command line

One thing is for sure, something so beautiful as Linux needs exploring. You can't expect anyone to trully show it's virtues that might come in handy to you. Everybody has their own cut, you have to do your.
So this other minute I was looking for some cheatsheet wallpaper to put up on my Desktop. Got a lot of them. Chose one, but the images is Black text on white backgroud, a serious problem to a maniac like me. Figured it needs some invertion, but firing up GIMP for such trivial task? :/ After a bit of drooling on ideas, Imagemagick hit my mind. One of the best tools for batch processing of images using the terminal. To install, type in:
sudo apt-get install imagemagick
There are many many options and things that can be done using this gem, cropping, resizing, inverting, even combining multiple effects. Some example commands are listed below
# Change format
convert howtogeek.png howtogeek.jpg

# Enforcing compression level
convert howtogeek.png -quality 95 howtogeek.jpg

# Resizing
convert example.png -resize 200×100 example.png
# enforce specification
convert example.png -resize 200×100! example.png
# maintain ratio
convert example.png -resize 200 example.png
# or 
convert example.png -resize x100 example.png

# Rotation
convert howtogeek.jpg -rotate 90 howtogeek-rotated.jpg

# Effects
# charcoal
convert howtogeek.jpg -charcoal 2 howtogeek-charcoal.jpg
# implode
convert howtogeek.jpg -implode 1 howtogeek-imploded.jpg
# invert
convert howtogeek.jpg -negate imploded.jpg

# Combination
convert howtogeek.png -resize 400×400 -rotate 180 -charcoal 4 -quality 95 howtogeek.jpg
You should explore the endless possibilities yourself.
NOTE: The commands have been copied from www.howtogeek.com

Friday, November 01, 2013

Make a backup of your dotfiles

If you are a regular Linux user, chances are you change distros to experiment with them. I am one of such persons who like to experiment with various Linux distros for both educational and experimental reasons. This activity may sometimes lead to problems regarding your Desktop Environment (DE) and others. It also might be the case that you just want to clean up your /home but keep your configurations intact using your dotfiles (The directories and files in your /home whose name start with a '.'). Moving these files manually is cumbersome (at least for me). The following script does it for me. And moves it to a folder called "dotfiles" in your ~/.
CAUTION: It removes any folder called 'dotfiles" in you ~/ and creates a new one.
You MUST run this in your ~/
rm -rf dotfiles
mkdir dotfiles
while read line; do
        if [ "$line" = "" ]; then
                continue
        fi
        if [ -d "$PWD/$line" ]; then
                echo "$PWD/$line is a folder"
                cp $PWD/$line $PWD/dotfiles/$line # substitute cp with mv to move the files
        else
                echo "$PWD/$line is a file"
                cp $PWD/$line $PWD/dotfiles/$line # substitute cp with mv to move the files
        fi
done < <(find . -maxdepth 1 -name ".*" -printf '%P\n')

Tuesday, January 01, 2013

Mounting NTFS in Xperia Neo V via USB-OTG (Read / Write both)

For newer devices (I don't know how to categorize them, maybe 2012 devices) it's easy to mount any filesystem in both R/W mood for Xperia series. But a little older devices (maybe all the others?) it's not so easy. Some support it partially and some don't (totally). My phone is Xperia Neo V and it doesn't seem to support that. Had a hard time to find this workaround but it's effective, FINALLY !!! :D
To mount NTFS in full support you need two things. A set of modules and the mount script. How to do that follows.
Pre-requisites:
1. Rooted device (you can find tutorials on that)
2. CWM installed (you can use X-Parts from Play Store
3. Script Manager

Steps:
1. First download this file. It is the ntfs-3g modules set compiled for Android.
2. Copy the zip to your SD-Card, in a folder that you can easily recognize by name
3. Reboot into recovery, to do this first turn your phone off. Then power it up and wait for the Sony Logo. When it comes keep pressing the volume down key repeatedly (the key maybe different for another device, do a little Googling to know which).
4. Now you're in CWM (hopefully, you'll see screen with a list of things). Choose 'install zip from sdcard'. Choose the zip file from the sdcard. It will show some messages. If all goes well the last line should be something like "....done"
5. Now supposing the modules have been installed correctly copy this script and save it with the name "MountScript.sh" in your SD-card.
#!/system/bin/sh
#
# Mount USB OTG NTFS Storage device - shardul_seth@xda
# Mount point checking added by - tafhim

# load fuse support
if [ ! -e /system/lib/modules/fuse.ko ]; then
 busybox echo -e "WARNING: fuse module not found!\nIs fuse built into kernel?"
else
 insmod /system/lib/modules/fuse.ko 
fi

# mount partitions
sdn=0
ls -l /dev/block/sd??
if [ $? -eq 0 ]; then
 for sd in `ls /dev/block/sd??`; do
  if [ -d "/sdcard/usb_drive_$sdn" ]; then
   umount /sdcard/usb_drive_$sdn
      rm -R /sdcard/usb_drive_$sdn
  fi 
  if [ ! -d "/sdcard/usb_drive_$sdn" ]; then        
   mkdir /sdcard/usb_drive_$sdn
   chmod 777 /sdcard/usb_drive_$sdn
   ntfs-3g -o umask=0 $sd /sdcard/usb_drive_$sdn
   if [ $? -ne 0 ]; then
    busybox mount -o umask=0 $sd /sdcard/usb_drive_$sdn
    echo "$sd mounted on /sdcard/usb_drive_$sdn"
   else
    echo "$sd (NTFS) mounted on /sdcard/usb_drive_$sdn"
   fi
   sdn=`expr $sdn + 1`
   if [ ! -z $SM_VERSION ]; then echo showToastLong "$sdn Drives mounted!" >&$SM_GUIFD; fi
  fi
 done
else
 echo "No drive found! Exiting.."
 if [ ! -z $SM_VERSION ]; then echo showToastLong "No drive found! Exiting.." >&$SM_GUIFD; fi
 exit 1
fi
exit 0
6. Connect your drive using the OTG cable.
7. If not installed download Script Manager from the Play Store. Run it and browse to the place where you saved the script. Select it
8. You don't have to change anything just select the "su" option that has an Android Skull (Pirate-ish) over it. Now select "Run" from the top-most menu.
9. If you see the message "1 drive mounted" or similar, you're done. Just go to the SD-card and drag down and you'll see the folder "usb_drive_0". If you have multiple partitions, all will be mounted.

You need to do all these only the first time. From later on, you only need to follow steps 6-9 only :)

For help on rooting / CWM Installation / etc head over to XDA Developers Forum.
For help on using FlashTool in Linux read this.

Xperia Neo V specific stuff:
Some nice kernels for Xperia Neo V are the Suave Kernel, the Super Stock Kernel and the Alliance Kernel MOD.
You can download kernel .562 and kernel .587 for Xperia Neo V MT11i. You need these to root your device using this method
The DooMLord rooting kit (windows) is available here
The DooMLord rooting kit (linux) is available here
The CWM Installer (windows) is available here
X-Parts apk is available here

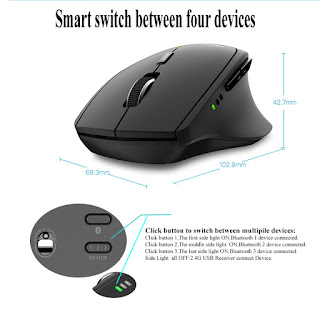
Connect Rapoo MT750S with Linux (Tested on Manjaro)

 I bought this obvious copy of MX Master 2S in hopes of having the device switching functionality along with a lightweight body because I ha...